

5.8a VS Code Extension
Use OpenCode in VS Code, Cursor, and other editors.
📝 Course Notes
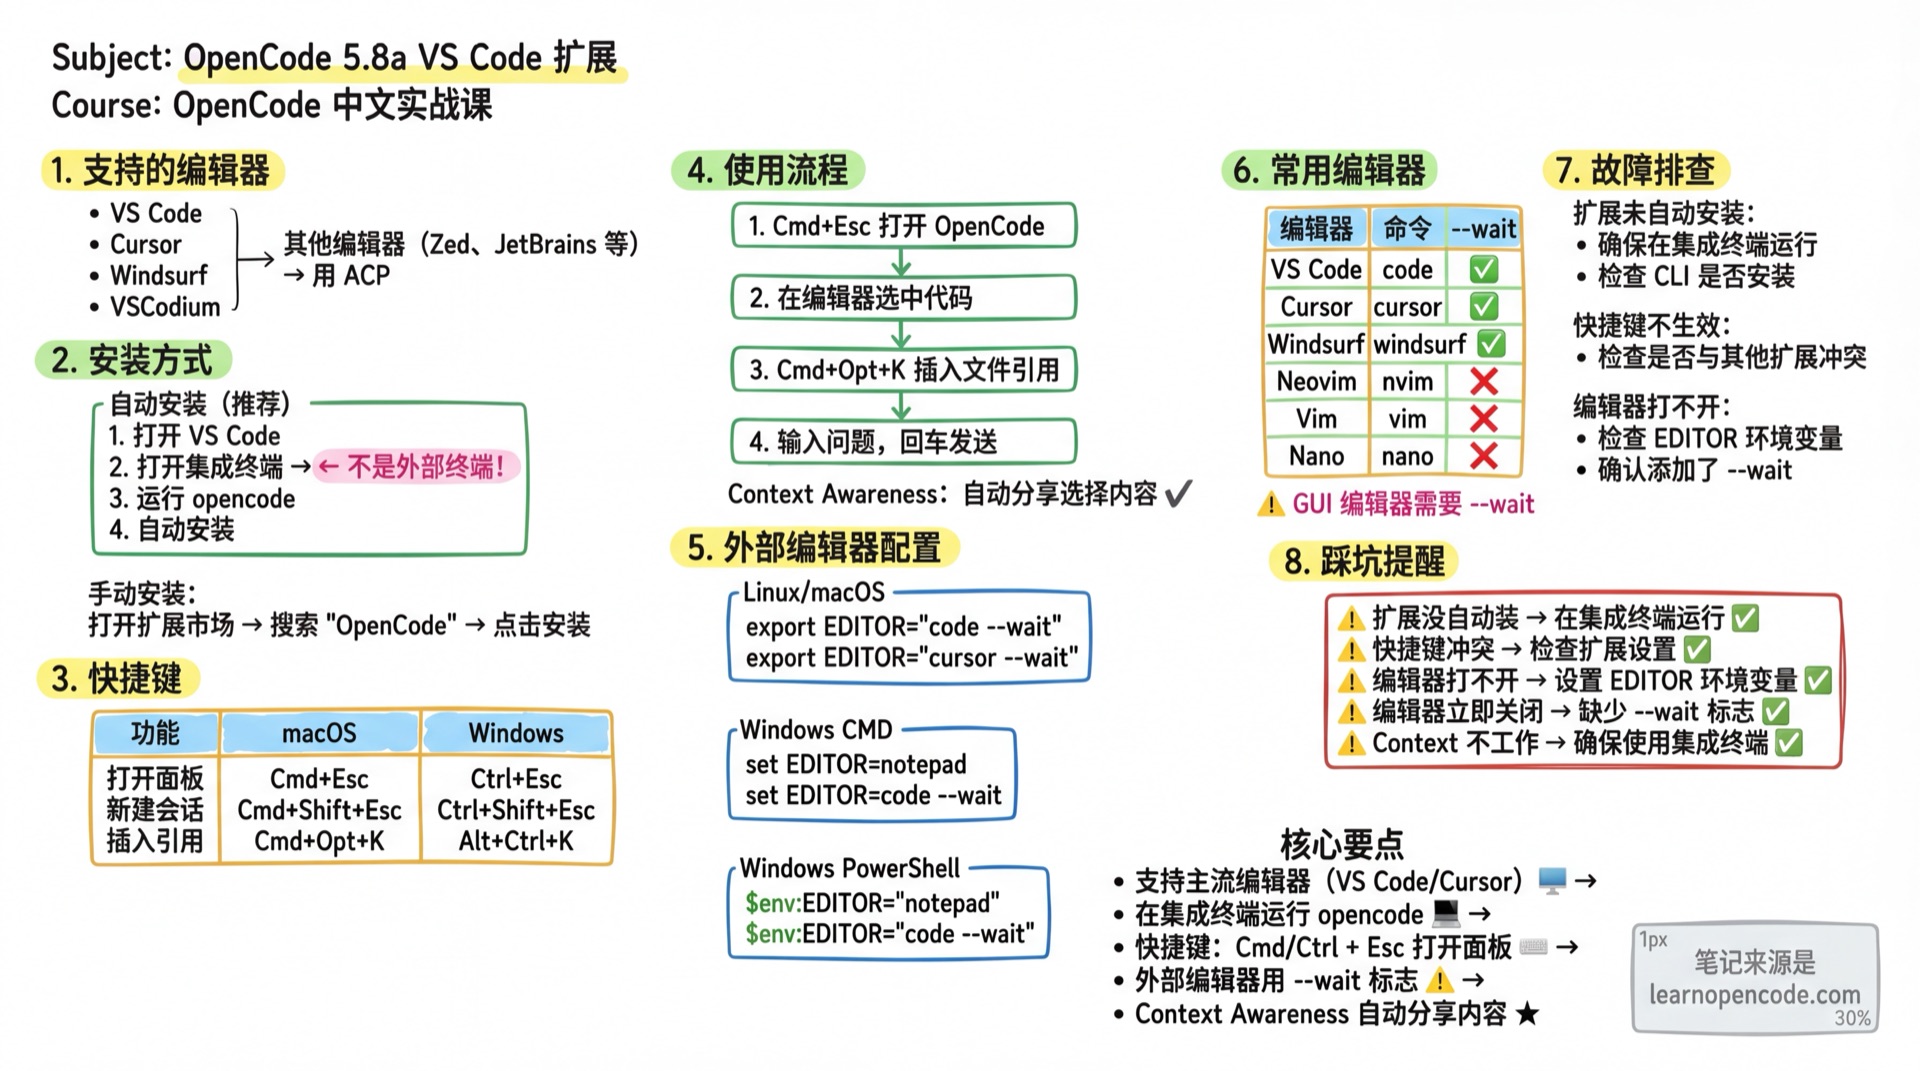
Key points from this lesson:
What You'll Learn
- Install the VS Code extension
- Use keyboard shortcuts for quick access
- Send selected code to OpenCode
- Configure external editors
Supported Editors
- VS Code
- Cursor
- Windsurf
- VSCodium
If you use Zed, JetBrains, Neovim, or other editors, see 5.8b ACP Protocol.
Installation
Automatic Installation (Recommended)
- Open VS Code
- Open the integrated terminal (not an external terminal)
- Run
opencode- the extension installs automatically
Manual Installation
- Open the Extensions Marketplace (
Cmd+Shift+X/Ctrl+Shift+X) - Search for "OpenCode"
- Click Install
Keyboard Shortcuts
| Action | macOS | Windows/Linux |
|---|---|---|
| Open Panel | Cmd+Esc | Ctrl+Esc |
| New Session | Cmd+Shift+Esc | Ctrl+Shift+Esc |
| Insert File Reference | Cmd+Option+K | Alt+Ctrl+K |
Feature Descriptions
- Open Panel: Opens the OpenCode terminal, or focuses an existing session
- New Session: Starts a new OpenCode session (even if one exists)
- Insert File Reference: Inserts the current file reference, formatted as
@File#L37-42
Usage Workflow
Cmd+Escto open the OpenCode panel- Select code in the editor
Cmd+Option+Kto insert a file reference- Type your question, press Enter to send
Context Awareness
The extension automatically shares your current selection or tab with OpenCode, no manual copy-paste needed.
External Editor Configuration
When you use the /editor or /export commands in the TUI, OpenCode opens an external editor.
Linux / macOS
# VS Code
export EDITOR="code --wait"

# Cursor
export EDITOR="cursor --wait"

# Vim
export EDITOR="vim"

# Nano
export EDITOR="nano"
Add to your shell configuration (~/.bashrc or ~/.zshrc) to make it permanent.
Windows CMD
set EDITOR=notepad

rem VS Code (requires --wait)
set EDITOR=code --wait
Use System Properties > Environment Variables to make it permanent.
Windows PowerShell
$env:EDITOR = "notepad"

# VS Code (requires --wait)
$env:EDITOR = "code --wait"
Add to your PowerShell profile to make it permanent.
Common Editors
| Editor | Command | Needs --wait |
|---|---|---|
| VS Code | code | Yes |
| Cursor | cursor | Yes |
| Windsurf | windsurf | Yes |
| Neovim | nvim | No |
| Vim | vim | No |
| Nano | nano | No |
| Sublime Text | subl | Yes |
| Notepad | notepad | No |
The
--waitflag makes the editor process block until closed, which is required for the/editorcommand to work properly.
Troubleshooting
Extension Not Auto-Installing
Ensure the following conditions are met:
- Run
opencodein VS Code's integrated terminal (not an external terminal) - The IDE CLI is installed:
- VS Code:
codecommand available - Cursor:
cursorcommand available - Windsurf:
windsurfcommand available - VSCodium:
codiumcommand available
- VS Code:
If the CLI is not installed:
Cmd+Shift+P(macOS) /Ctrl+Shift+P(Windows)- Search for "Shell Command: Install 'code' command in PATH"
- VS Code has permission to install extensions
Common Issues
| Symptom | Cause | Solution |
|---|---|---|
| Extension didn't auto-install | Not running in integrated terminal | Run opencode in VS Code's built-in terminal |
| Shortcuts not working | Conflict with other extensions | Check keyboard shortcut settings, modify conflicts |
| Editor won't open | EDITOR variable not set | Set export EDITOR="code --wait" |
| Editor closes immediately | Missing --wait flag | Add the --wait parameter |
Further Reading
- 5.8b ACP Protocol - Zed, JetBrains, Neovim, and other editor integrations
- Cheatsheet / Keyboard Shortcuts - Complete keyboard shortcut list
Lesson Summary
You learned:
- VS Code extension installation methods (automatic/manual)
- Common keyboard shortcuts (open panel, new session, insert reference)
- External editor configuration (multi-platform support)
- Common troubleshooting
Next Lesson Preview
In the next lesson, we'll learn about the ACP Protocol, enabling you to use OpenCode in Zed, JetBrains, Neovim, and other editors.