Installation: Done in 5 Minutes
📝 Course Notes
Key takeaways from this lesson:
What You'll Be Able to Do
- Type
opencode --versionin your terminal and see the version number
Core Concept
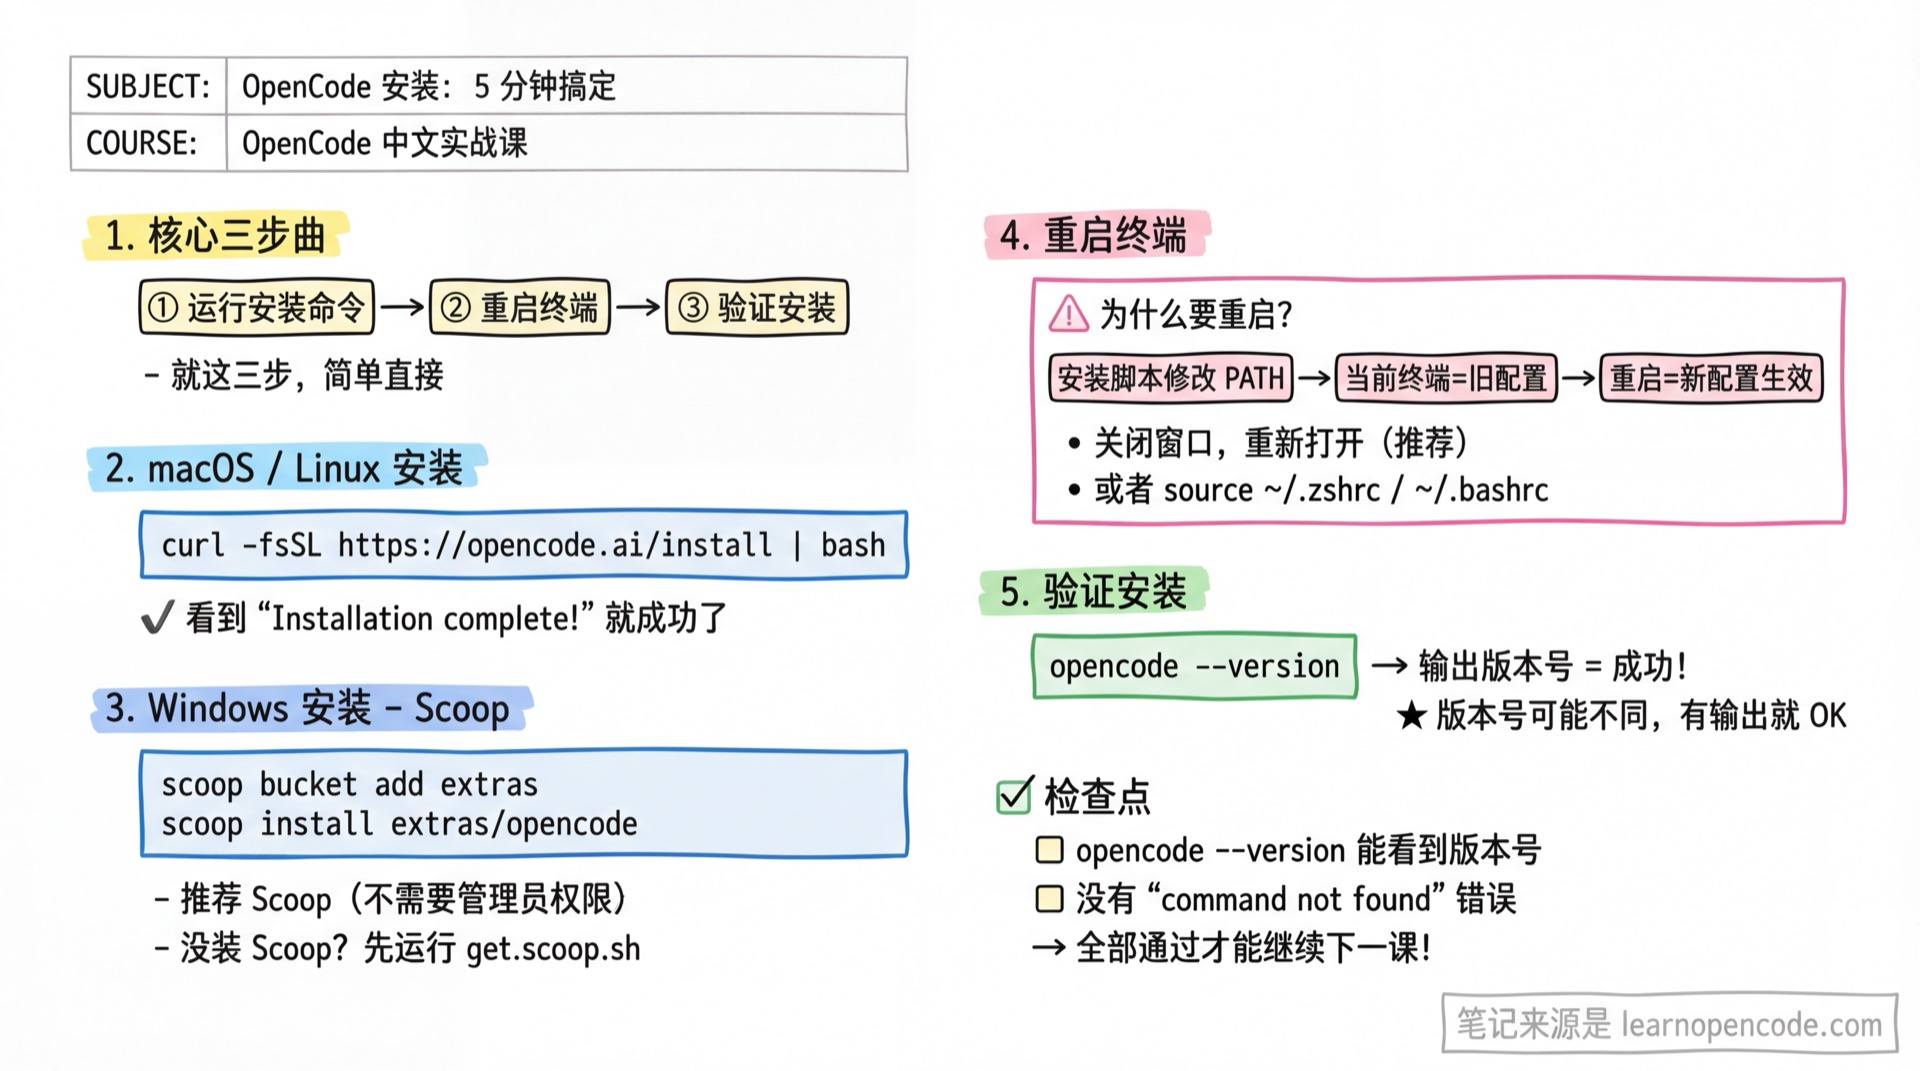
Installing OpenCode is just three steps:
- Run the installation command
- Restart your terminal (to apply PATH changes)
- Verify the installation
Follow Along
macOS / Linux Users
Copy the command below, paste it into your terminal, and press Enter:
curl -fsSL https://opencode.ai/install | bashWhat You'll See (Success Case)
Installing OpenCode...

→ Detected: macOS arm64
→ Downloading opencode-darwin-arm64...
  ████████████████████████████████████████ 100%
→ Installing to ~/.opencode/bin/opencode...
→ Updating shell configuration...

✓ Installation complete!

To get started, restart your terminal and run:

  opencode
When you see Installation complete!, you're all set.
Windows Users
We recommend installing via Scoop on Windows (no admin rights required).
If you already have Scoop:
scoop install opencodeDon't Have Scoop? Click to Expand Installation Steps
Open PowerShell (regular user permissions recommended), and run these commands one by one in order:
Step 1: Allow Script Execution (Only Needed Once)
Set-ExecutionPolicy -ExecutionPolicy RemoteSigned -Scope CurrentUserStep 2: Install Scoop
Invoke-RestMethod -Uri https://get.scoop.sh | Invoke-Expression⚠️ Running as Administrator?
If your PowerShell is running with administrator privileges (window title shows "Administrator"), the above command will fail. Use this command instead:
powershelliex "& {$(irm get.scoop.sh)} -RunAsAdmin"
Step 3: Install Git (Scoop needs Git to add buckets)
scoop install gitStep 4: Install OpenCode
scoop install opencodeOther Windows Installation Methods
If you prefer Chocolatey, npm, Docker, or other methods, see 1.2a Alternative Installation Methods.
Restart Your Terminal
Why Restart?
The installation script modified your environment variables (PATH), but your current terminal is still using the old configuration. Only after restarting will it recognize the opencode command.
How to Restart:
- Close your current terminal window (click the X, or press Cmd+Q / Alt+F4)
- Open a new terminal
Don't Want to Close the Window?
You can also manually reload the configuration:
macOS/Linux (zsh):
source ~/.zshrcmacOS/Linux (bash):
source ~/.bashrcBut I recommend just restarting - it's more reliable.
Verify Installation
Type:
opencode --versionYou Should See:
opencode x.x.xThe version number will change with updates. As long as it displays a version number, the installation was successful.
Checklist ✅
All items must pass before continuing
- [ ] Typing
opencode --versionin terminal shows the version number - [ ] No
command not founderror
Having Issues?
If you encounter problems during installation (command not found, network timeout, permission denied, etc.), see 1.2b Installation Troubleshooting
🚀 Want to Try It Now? (Optional)
After successful installation, you can start OpenCode directly to try the free models:
opencodeOnce started, type /models, select a free model with the -free suffix (like opencode/glm-4.7-free), then send any message to start chatting.
Note
Free models require no registration or API Key, perfect for quick testing. See 1.4a Free Models for details.
🖥️ Desktop App (Optional)
If you prefer a graphical interface, OpenCode also offers a desktop application.
Download and Install
| Platform | Download Method |
|---|---|
| macOS (Apple Silicon) | Download opencode-desktop-darwin-aarch64.dmg from GitHub Releases |
| macOS (Intel) | Download opencode-desktop-darwin-x64.dmg |
| Windows | Download opencode-desktop-windows-x64.exe |
| Linux | .deb, .rpm, or AppImage |
Package Manager Installation:
# macOS Homebrew
brew install --cask opencode-desktop

# Windows Scoop
scoop bucket add extras
scoop install extras/opencode-desktop
Desktop vs Terminal Version
| Feature | Terminal (TUI) | Desktop |
|---|---|---|
| Interface | Command line | Graphical window |
| System Notifications | ❌ None | ✅ Auto-notify on task completion |
| Multiple Windows | ❌ Single window | ✅ Supports multiple tabs |
| Installation Complexity | Simple | Slightly complex (need to download installer) |
Recommendation
Install both. Use the terminal version for daily work (more efficient), and the desktop version for long-running tasks (can minimize, notifies you when done).
Lesson Summary
You learned:
- Install OpenCode with a single command
- Verify the installation was successful
- Know about the desktop app (optional)
Next Lesson Preview
In the next lesson, we'll configure networking so OpenCode can connect to AI services.
Note for users in China: If you plan to use models like Zhipu, DeepSeek, or other domestic providers, you can skip the networking lesson and go directly to "Connect to Models".
Having Issues?
Stuck during installation? Join the community to connect with 2000+ fellow learners and get real-time help.